Transform Your Blinds with These 5 DIY Hacks
Transform Your Blinds with These 5 DIY Hacks
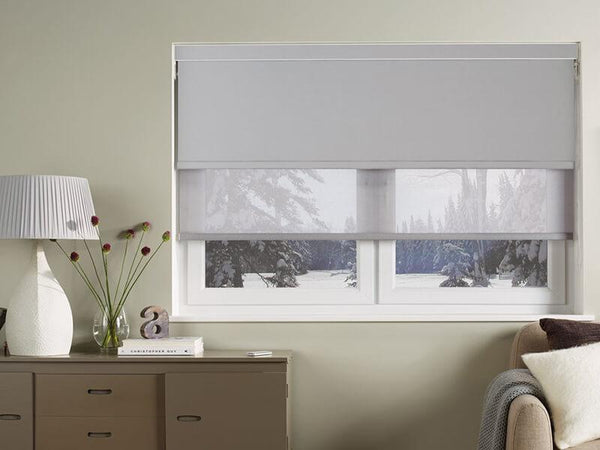
Introduction
Blinds can play a significant role in enhancing the overall look and feel of your home. While they serve a practical purpose by controlling light and maintaining privacy, they can also contribute to the aesthetic of your interior design. However, investing in high-end designer blinds can be quite costly. Fortunately, with a few simple DIY hacks, you can easily upgrade your existing blinds to give them a designer look without the hefty price tag. This blog post will guide you through five creative ways to elevate your blinds using affordable materials and techniques. Whether you're interested in DIY projects or searching for inspiration online, these tips will help you achieve a stylish, custom look for your blinds while keeping costs down.
Hack 1: Attach Elegant Trims
One of the simplest ways to upgrade your blinds is by attaching decorative trims. These trims can instantly add a sophisticated touch and can be customized to match the style of your home. Consider using decorative trims like tassels, braids, or beaded fringes. Tassels offer a playful elegance, while braids provide a classic and timeless look. Beaded fringes can bring a bit of sparkle and texture, adding depth to your window treatments.
To get started, head to a craft store or look online for a variety of trim options. You’ll find an array of colors, patterns, and styles to choose from, allowing you to pick something that perfectly complements your room’s existing decor. Once you’ve selected your trim, gather your supplies: fabric glue or a hot glue gun will work well for this project.
Before you start gluing, lay out your blinds on a flat surface. This will give you a clear view and make it easier to apply the trim accurately. Measure the length of the trim needed for each side of the blinds, and cut it accordingly. Be sure to add a little extra length to ensure full coverage from top to bottom.
Begin by applying a thin line of fabric glue or a line of hot glue along the edge of the blinds where you plan to attach the trim. Carefully press the trim into the glue, starting at the top and working your way down. Take your time to ensure it adheres properly and lies flat. If you’re using fabric glue, allow it to dry completely before handling the blinds again. For hot glue, wait a few minutes until it has fully set.
Feel free to get creative with your placement. You might choose to add trim just along the bottom edge for a subtle touch, or you could outline all four sides for a more dramatic effect. Don’t hesitate to mix and match different trims to create a unique, layered look. For example, pairing a simple braid with a fringe can add both texture and visual interest.
Another option is to incorporate trims in a contrasting color to make your blinds stand out. If your room features neutral tones, a bold trim can serve as an eye-catching accent. Conversely, if your space is already vibrant, a neutral or metallic trim can add a touch of elegance without overwhelming the decor.
Attaching elegant trims to your blinds is a cost-effective way to achieve a high-end look. With just a little effort and creativity, you can transform plain blinds into custom pieces that enhance your home's overall design.
Hack 2: Revamp with a Fresh Coat of Paint
Sometimes, all your blinds need is a fresh coat of paint to completely transform their appearance. Painting is a versatile option that allows you to express your creativity while enhancing the overall look of your space. Consider trendy colors like soft pastels for a calming effect, or bold, deep hues for a dramatic statement. Neutral tones can also work well if you prefer a minimalist design. When selecting paint, ensure it’s suitable for the material of your blinds, and always remember to clean and prime the surface for a smooth application.
Begin by removing the blinds from the window and laying them out on a flat surface. This step is crucial for ensuring an even application of paint. If your blinds are dusty or dirty, clean them thoroughly with a mild soap and water solution, and let them dry completely. This will help the paint adhere better and result in a smoother finish.
Next, you’ll need to prime the blinds. Primer helps the paint stick to the surface and can also block any existing stains or discolorations. Use a primer that is compatible with the type of paint you’ve chosen. Apply a thin, even coat of primer and allow it to dry according to the manufacturer’s instructions.
Once the primer is dry, it’s time to start painting. Opt for a high-quality paint that is designed for the material of your blinds, whether they are wood, metal, or plastic. Acrylic and latex paints are excellent choices for most surfaces, as they provide good coverage and durability. For wooden blinds, consider using a paint with a built-in sealer to protect the wood from moisture and UV damage.
Use a small foam roller or a high-quality paintbrush to apply the paint in thin, even layers. A foam roller is ideal for achieving a smooth finish without brush marks. If you prefer a textured look, a paintbrush can add subtle texture and depth. Work slowly and carefully, making sure to cover all areas of the blinds, including the edges and corners.
Allow the first coat of paint to dry completely before applying a second coat. Multiple thin coats are better than one thick coat, as they will reduce the risk of drips and ensure a more even finish. Depending on the color and type of paint you’re using, you may need two or three coats to achieve the desired coverage and color intensity.
After the final coat has dried, reinstall the blinds and step back to admire your handiwork.
Hack 3: Add Textural Elements
Adding textural elements to your blinds can dramatically enhance their appearance, giving them a unique and sophisticated look. One way to introduce texture is by incorporating fabric overlays. You could use materials like burlap for a rustic touch, lace for an elegant vibe, or even sheer fabrics to soften the overall appearance. These fabrics can be draped over the blinds or attached to create a seamless look.
To start, measure the dimensions of your blinds to determine how much fabric you'll need. Once you have your measurements, cut the fabric accordingly, leaving a bit of extra material to account for any adjustments. For a professional finish, consider hemming the edges to prevent fraying.
There are several methods for attaching the fabric to the blinds. Fabric glue is a simple, no-sew option that works well for lighter materials like lace or sheer fabrics. Apply a thin line of fabric glue along the top edge of the blinds, press the fabric into the glue, and allow it to dry completely before handling. If you're using a heavier material like burlap, a hot glue gun might offer a more secure bond.
Sewing the fabric onto the blinds is another option for a more durable attachment. If you have a sewing machine and some basic sewing skills, you can sew the fabric directly onto the edges of the blinds. Start by pinning the fabric in place to ensure it's aligned correctly, then sew a straight stitch along the edges. This method is particularly effective for adding layers of fabric, allowing you to mix and match different textures for a custom look.
Another way to introduce texture is by adding embellishments like fabric flowers, buttons, or ribbons. These small details can make a big impact, adding visual interest and a touch of personality to your blinds. For example, fabric flowers can be glued or sewn along the bottom edge of the blinds, creating a charming, whimsical effect. Buttons can be used to create patterns or accents, while ribbons can be tied around the slats for a playful, decorative touch.
Consider also using textured paint to achieve a similar effect. Specially formulated textured paints can be applied to the blinds to create a raised, tactile surface. Whether you choose a subtle texture or a more pronounced pattern, this technique adds depth and interest without the need for additional materials.
By adding these textural elements, you can transform your blinds into stylish, eye-catching features that enhance the overall decor of your home.
Hack 4: Combine Patterns for a Designer Look
Mixing patterns can instantly elevate the look of your blinds, giving them a designer feel. The secret lies in finding a balance between different designs while ensuring they complement the room’s overall decor. Start by selecting a base pattern for your blinds, whether it’s stripes, florals, or geometric shapes. This primary design will serve as the foundation for introducing additional patterns.
To add layers of visual interest, incorporate complementary fabrics or stencils. For example, if you’ve chosen a striped base, consider adding a floral or geometric overlay to create a striking contrast. Pay close attention to the color scheme; coordinating colors will help different patterns work harmoniously together. You can achieve this by sticking to a specific color palette that matches your room’s existing decor.
Using stencils is an excellent way to mix patterns without overwhelming the space. Choose stencils that feature designs like chevrons, polka dots, or intricate motifs. You can stencil these patterns directly onto the blinds using paint that matches or contrasts with the base color. This technique allows you to customize the design without permanently altering the fabric, giving you the freedom to change things up later.
Layering fabrics is another effective method to combine patterns. Consider using a sheer fabric with a subtle design over a more bold, solid pattern. The sheer layer will soften the overall look while adding depth and dimension. Secure the fabrics with fabric glue or by sewing them together, ensuring they lie flat and smooth.
If you prefer a more understated approach, consider adding patterned accessories to your blinds. Fabric ties, sashes, or even decorative clips can introduce new patterns in a subtle, elegant way. These accessories are easy to swap out, allowing you to update the look of your blinds seasonally or whenever you feel like a change.
Remember, balance is key. Too many conflicting patterns can create visual chaos, while well-coordinated designs will look intentional and stylish. Experiment with different combinations until you find a look that feels right for your space. By thoughtfully mixing patterns, you can create custom blinds that serve as a focal point in your room and reflect your unique style.
Hack 5: Upgrade Your Hardware
A small change can have a big impact, and upgrading the hardware on your blinds is a perfect example. New brackets, pulls, and chains can refresh the look of your window treatments without requiring a complete overhaul. Opt for hardware that complements the existing decor in your room to create a cohesive and polished look.
Start by assessing the current hardware on your blinds. If it's outdated, worn, or doesn't match the rest of your decor, it's time for an upgrade. Many blinds online retailers offer a wide range of hardware options in various styles and finishes, from sleek brushed nickel to rustic antique brass. Choose a finish that either matches or complements other metal elements in your room, such as door handles or light fixtures.
Replacing the brackets can make a significant difference. Look for sturdy, stylish brackets that not only support the blinds effectively but also add a decorative touch. Modern, minimalist brackets can give a contemporary feel, while more ornate options can add a touch of classic elegance.
Pulls and chains are another easy upgrade. Switching out plastic or plain metal pulls for more decorative options can immediately enhance the look of your blinds. Consider pulls made from materials like crystal, wood, or even leather for a unique touch. For the chains, you might choose metal over plastic for a more durable and stylish option. Chains in finishes like chrome, brass, or matte black can add sophistication and tie the look together.
Installation is straightforward and typically requires just a screwdriver and a bit of time. Carefully remove the old hardware, being mindful not to damage the blinds. Follow the manufacturer's instructions to install the new hardware securely. If you're uncertain, many online tutorials can guide you through the process step-by-step.
Don't forget to consider functionality along with aesthetics. If your blinds are difficult to operate, upgrading to a more efficient system can improve both form and function. Cordless options are increasingly popular for their clean look and safety features, especially in homes with children or pets.
Adding decorative finials can also enhance your blinds. These small details at the end of the headrail can make a big difference in the overall appearance. Finials come in various shapes and finishes, allowing you to customize the look further.
Upgrading your hardware is a simple yet effective way to refresh your blinds. This small change can provide a big payoff, making your window treatments look and feel more custom and polished. So take a closer look at the hardware on your blinds and see how a few strategic upgrades can enhance your home decor.
Conclusion
Revamping your blinds with these DIY techniques not only saves money but also gives your home a unique and personalized touch. By using elegant trims, a fresh coat of paint, textural elements, mixed patterns, and upgraded hardware, you can easily achieve a high-end look that mirrors professional interior design. Each hack offers a practical yet creative solution, allowing you to refresh your decor in a budget-friendly manner.
Implementing these ideas is straightforward and doesn't require advanced skills, making them accessible to anyone looking to spruce up their living space. Whether you’re a seasoned DIY enthusiast or a beginner, these projects offer varying levels of complexity to match your comfort and skill set. Plus, the flexibility in material choices and styles means you can tailor each project to fit your personal taste and the overall theme of your home.
Not only do these upgrades enhance the aesthetic appeal of your blinds, but they also add to the overall functionality. For instance, new hardware can make your blinds easier to operate, while fresh paint can protect them from wear and tear. Textural elements and patterns can even influence the ambiance of a room, making it feel cozier or more vibrant.
Another significant advantage is the satisfaction that comes from completing a DIY project. There's a sense of pride in knowing that you’ve personally contributed to the beauty and functionality of your home. These projects also provide an excellent opportunity to experiment with different design trends and techniques without committing to a major renovation.
In essence, these hacks serve as a practical guide to transforming ordinary blinds into standout features. They allow you to blend creativity with practicality, resulting in a customized look that is both stylish and functional. So why wait? Dive into these DIY projects and watch your home transform, one blind at a time. Your revamped blinds will not only enhance your living space but also serve as a testament to your creativity and resourcefulness.