Perfect DIY Blinds for Odd-Shaped Windows
Perfect DIY Blinds for Odd-Shaped Windows
Introduction to Custom Blinds for Unconventional Windows
When dealing with uniquely shaped windows, finding the right window treatments can often feel like an uphill battle. However, with some ingenuity and effort, crafting your own blinds can become a rewarding project. DIY blinds grant you the freedom to customize your window coverings to fit any unique shape, be it arched, tiny, or unusually large.
The key advantage of opting for DIY blinds lies in the flexibility to perfectly match your home’s aesthetic while addressing the specific challenges posed by these unconventional window types. With the convenience of shopping blinds online, you can explore an extensive range of materials and designs without ever leaving your home. This broad selection allows you to choose the best options to complement your decor and functional requirements.
DIY blinds are not just about utility; they add a personal flair to your living space, making it uniquely yours. Customizing your blinds to fit unconventional windows ensures that you won't have to settle for off-the-shelf solutions that may not offer the perfect fit or style you're seeking. Plus, the process of measuring, selecting materials, and installing the blinds can be incredibly satisfying.
Shopping for blinds online offers an unparalleled variety of choices. You can easily compare materials such as fabric, wood, and faux wood, and select from numerous patterns and colors. Whether you're aiming for a light, airy feel with fabric blinds or a more substantial, classic look with wooden blinds, the options are virtually limitless. This wide array allows you to make decisions that are both aesthetically pleasing and practical.
The personalization doesn't stop at materials and colors. Online retailers often provide custom sizing options, allowing you to input the exact dimensions of your windows. This feature is especially beneficial for homeowners dealing with arched, small, or oversized windows that standard sizes simply can't accommodate. Custom sizing ensures that your blinds will fit perfectly, eliminating gaps that could let in unwanted light or diminish the overall appearance.
Another advantage of going the DIY route is the potential for cost savings. By taking on the project yourself, you can avoid labor costs and have greater control over your budget. Many online shops offer competitive pricing, discounts, and promotions that can further reduce the cost of your custom blinds.
Taking on the challenge of creating your own blinds may seem daunting at first, but it can become an enjoyable and fulfilling project. With the right tools and a bit of patience, you'll find that the process is manageable and even fun. Each step, from measuring to installation, offers an opportunity to learn and develop new skills, adding to the overall satisfaction once the project is completed.
The blend of creativity, effort, and customization makes DIY blinds an appealing option for addressing the tricky nature of unconventional windows. The ability to shop blinds online further simplifies the process, making it accessible and convenient for anyone willing to take on the project. By embracing the DIY approach, you can achieve a perfect fit and style that truly enhances your living space.
Precise Measurement Techniques
Getting accurate measurements is essential for creating DIY blinds that fit perfectly. When working with unconventional window shapes, each type requires a slightly different approach to measurement.
For arched windows, you need to measure both the width and the height carefully. Start by measuring the width at the base, as this is usually the widest part of the window. Next, measure the height at the tallest point in the center of the arch. These dimensions will help you create a template that matches the window's unique shape.
Small windows, on the other hand, require meticulous attention to detail for both the height and width. Begin by measuring the width from one side to the other at the top, middle, and bottom of the window frame. Use the smallest of these measurements to ensure the blinds will fit snugly within the frame. Then, measure the height from the top of the frame to the bottom at both the left and right sides. Use the longest height measurement to ensure full coverage.
Oversized windows present another set of challenges, as their larger dimensions can make precise measurement more difficult. Measure the width at several points, including the top, middle, and bottom, and use the narrowest measurement. For the height, measure from the top to the bottom on both sides, using the longest measurement. Don't forget to account for any obstructions such as handles, cranks, or mullions that might interfere with the blinds.
In all cases, use a metal tape measure for the most accurate results, as fabric or plastic tape measures can stretch or bend, leading to errors. Double-check each measurement to avoid mistakes. Recording your measurements immediately and clearly labeling them can prevent mix-ups later on.
When measuring, consider how you plan to mount the blinds. Inside mounts require measurements that fit within the window frame, while outside mounts will need extra width and height to cover the entire window and frame. If you choose an inside mount, subtract about 1/8 inch from the width measurement to ensure the blinds can move freely. For outside mounts, add a few inches to both the width and height to ensure complete coverage and better light control.
Additionally, measuring tools like a level can help ensure your measurements are straight and accurate, especially for wider or taller windows. For arched or irregularly shaped windows, creating a paper or cardboard template can be particularly helpful. This template can then be used to cut materials to the exact shape needed.
Overall, taking the time to measure accurately and thoroughly will save you effort and frustration when it comes time to install your DIY blinds.
Selecting Appropriate Materials
When choosing materials for your DIY blinds, it's crucial to consider factors such as durability, light control, and aesthetic appeal. The material you select will greatly impact the functionality and appearance of your window coverings.
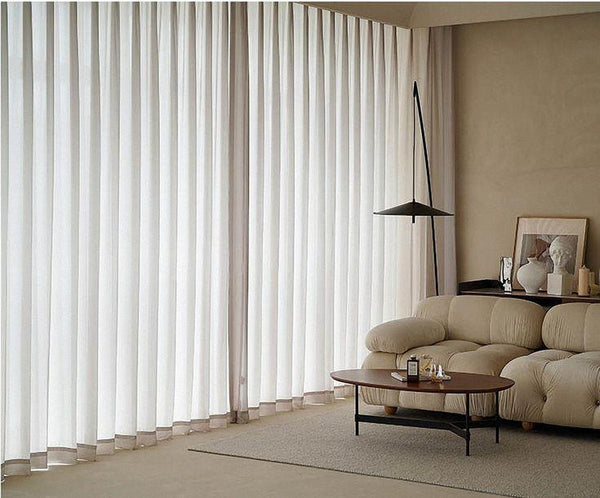
Fabric blinds are a popular choice for those seeking a soft, elegant look. They come in a wide array of patterns and colors, allowing you to match them seamlessly with your home decor. However, fabric blinds might not offer complete blackout capabilities, making them more suitable for living rooms or dining areas where some natural light is desired. If you prefer a room-darkening effect, look for thicker fabrics or those with a blackout lining.
Wooden blinds provide excellent light control and add a touch of natural beauty to any room. They are sturdy and durable but tend to be heavier, requiring a more secure installation. Wooden blinds are ideal for creating a warm, classic look and work well in spaces like offices or bedrooms. Keep in mind that they might need more maintenance to preserve their appearance, especially in humid environments.
Faux wood blinds are an excellent alternative to real wood. They offer the same aesthetic appeal and light control benefits but are typically more resistant to moisture and warping. This makes them a great option for kitchens and bathrooms where humidity levels are higher. Faux wood is also generally more budget-friendly, providing a similar look at a lower cost.
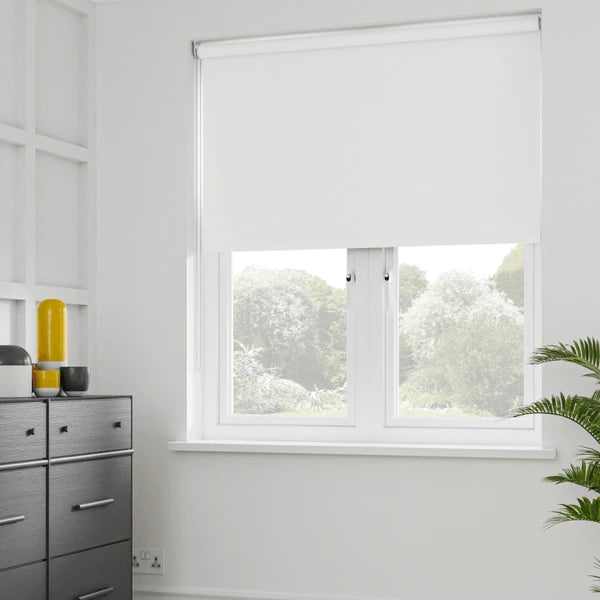
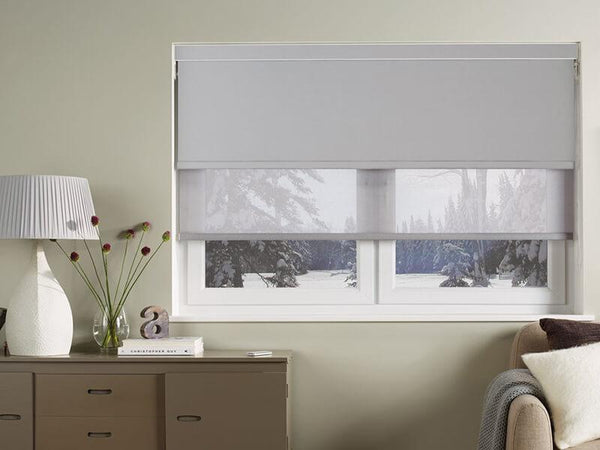
For those who prefer modern and sleek window treatments, aluminum or vinyl blinds might be the way to go. These materials are lightweight, easy to clean, and resistant to moisture, making them perfect for any room in the house. They are available in various colors and finishes, giving you the flexibility to choose the best match for your interior design.
Natural materials like bamboo or woven wood blinds can bring a touch of eco-friendly charm to your home. These materials are sustainable and offer a unique, textured appearance that works well in spaces with a rustic or bohemian vibe. Bamboo blinds are also effective at diffusing light, creating a warm, inviting atmosphere.
When shopping for blinds online, take advantage of the wide selection available to compare different materials, patterns, and colors. This allows you to find the perfect balance between style, functionality, and budget. Ensure that the materials you choose meet the specific needs of each room, whether it's moisture resistance for a bathroom or enhanced light control for a bedroom. By carefully selecting the right materials, you can create custom blinds that not only fit your windows perfectly but also enhance the overall aesthetic of your home.
Tips for DIY Installation
Before diving into the installation process, ensure you have all the necessary tools ready. Common tools you’ll need include a drill, screwdriver, level, measuring tape, pencil, and a stepladder. Refer to the specific instructions provided with your blind kit, as different types may require additional tools or steps.
Start by marking the positions where you’ll install the mounting brackets. Use a pencil to lightly mark these spots, ensuring they are level and evenly spaced. If you're doing an inside mount, make sure the brackets are set far enough from the window frame to allow the blinds to move freely. For an outside mount, position the brackets wide enough to fully cover the window and frame.
Next, pre-drill the holes for the screws. This step is crucial for preventing the wood from splitting and ensures that the screws go in smoothly. Using your drill, carefully insert the screws to secure the brackets. Double-check that they are level and firmly in place, as misaligned brackets can cause the blinds to hang crookedly and affect their functionality.
Once the brackets are secure, it’s time to attach the blinds. Depending on the type of blinds you’re installing, this may involve snapping the headrail into the brackets or using additional screws to secure it. Follow the manufacturer’s instructions to ensure a secure fit.
After attaching the blinds, test their operation. Pull the cords to raise and lower the blinds, ensuring they move smoothly and evenly. If the blinds are not functioning correctly, check for any obstructions or misalignments in the brackets or headrail. Sometimes, minor adjustments are needed to achieve smooth operation.
For blinds with a tilt function, make sure the tilt mechanism works properly. Adjust the tilt rod or wand to test the movement of the slats. This is especially important for blinds that need to provide light control and privacy.
If you encounter any issues, don’t rush through the troubleshooting process. Carefully inspect each component to identify the problem. Common issues might include tangled cords, misaligned slats, or brackets that are not level. Taking the time to correct these problems will save you from frustration later on.
Finally, take a moment to ensure that all screws and brackets are tightly secured. Loose components can cause the blinds to shift or fall, posing a potential hazard. By double-checking everything, you ensure that your installation is safe and durable.
Care and Upkeep for Your Personalized Blinds
To keep your personalized blinds in top condition, routine maintenance is essential. Start by regularly dusting the blinds with a microfiber cloth or using a vacuum cleaner with a brush attachment to remove any accumulated dirt and debris. This will help maintain their appearance and functionality over time.
For fabric blinds, you can perform a deeper cleaning by using a damp cloth with a mild detergent. Gently wipe the surface to remove any stains or dirt, being careful not to soak the fabric as excessive moisture can damage it. For wooden blinds, use a wood cleaner that is appropriate for the type of wood to maintain its luster and prevent drying or cracking. Make sure to wipe in the direction of the wood grain to avoid any potential scratches.
Faux wood blinds are generally more resistant to moisture and can be cleaned with a damp cloth and mild detergent without worry. Aluminum and vinyl blinds can be wiped down with a damp cloth or sponge, making sure to dry them thoroughly afterward to prevent any water spots or streaks.
Tangled cords or malfunctioning mechanisms should be addressed promptly to prevent further issues. If you notice any cords getting tangled, gently untangle them and check for any knots that may need to be removed. For blinds with tilt mechanisms, ensure the tilt rod or wand is functioning properly by adjusting and testing its movement. This will help maintain smooth operation and extend the lifespan of the blinds.
Regularly inspect the brackets and screws to ensure they remain tight and secure. Loose components can cause the blinds to shift or fall, potentially damaging the blinds or posing a safety hazard. If you find any loose screws or brackets, tighten them immediately.
If your blinds have moving parts, such as tilt mechanisms or lift cords, lubricate them occasionally with a silicone-based lubricant to ensure smooth operation. Avoid using oil-based lubricants as they can attract dust and dirt.
Keep an eye out for any signs of wear and tear, such as frayed cords or damaged slats. Addressing these issues early on can prevent more significant problems down the line. If a component is beyond repair, consult the manufacturer’s guidelines or contact customer service for replacement parts.
By following these maintenance tips, you can ensure your personalized blinds continue to enhance your home while functioning smoothly for years to come. Regular upkeep not only preserves their aesthetic appeal but also maximizes their longevity, making your investment worthwhile.
Conclusion and Motivation
Taking on the project of creating custom blinds for unconventional windows not only provides a practical solution but also allows you to add a personalized touch to your home. The flexibility of crafting your own window coverings means you can achieve a perfect fit for any window, whether it's arched, small, or oversized. This project empowers you to overcome the challenges posed by these unique window shapes with creativity and precision.
Shopping for blinds online further simplifies this process, offering a vast array of materials, styles, and custom sizing options. This convenience ensures that you can find exactly what you need to match your home’s decor and functional requirements without compromising on quality or aesthetics. The variety available online allows you to make informed choices, comparing different fabrics, woods, and finishes to achieve the ideal look and functionality for your space.
Moreover, the cost savings associated with DIY projects are significant. By measuring, selecting materials, and installing the blinds yourself, you avoid labor costs and gain greater control over your budget. Many online retailers provide competitive pricing, discounts, and promotions, making it even more affordable to customize your window treatments.
The process itself, from initial measurements to the final installation, can be incredibly fulfilling. Each step offers an opportunity to learn new skills and gain a sense of accomplishment. The hands-on nature of the project not only results in a more intimate connection with your living space but also enhances the overall ambiance of your home.
In addition, the satisfaction of seeing your hard work come to fruition is unmatched. Custom blinds that fit perfectly and complement your interior design add both beauty and functionality to your home. They also offer practical benefits such as improved light control, increased privacy, and better energy efficiency.
Embrace the challenge and creativity involved in crafting your own blinds. With the right tools, materials, and a bit of patience, you can transform your windows into stunning focal points. The journey from concept to completion is a rewarding experience that adds lasting value to your home, making it a project well worth undertaking.