Mastering DIY Blackout Curtains & Blinds at Home
Mastering DIY Blackout Curtains & Blinds at Home
Introduction to DIY Blackout Curtains
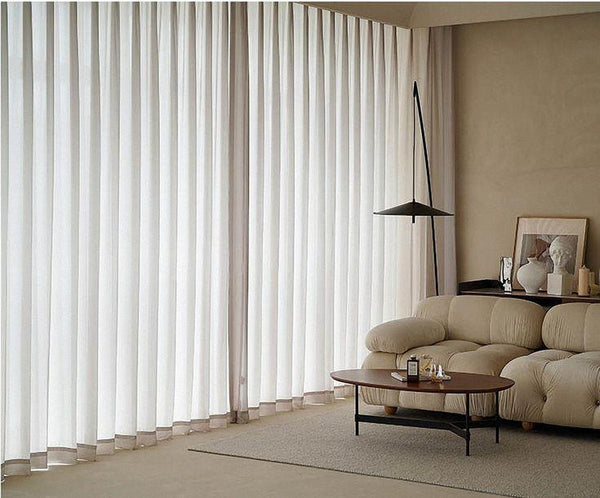
In today's sophisticated world of home design, blackout curtains have become an essential element for those looking to elevate their interior spaces with a blend of style and practicality. These versatile window treatments not only add an aesthetic appeal but also serve crucial functional purposes. They provide an effective solution for enhancing privacy, controlling light, and improving energy efficiency within your living spaces. Whether you're aiming to block out the intrusive early morning sun or create a cozy, intimate atmosphere in your home, mastering the installation of your own blackout curtains can be both a rewarding and cost-effective endeavor.
The allure of DIY blackout curtains lies in the ability to customize and personalize your window treatments to perfectly match your home décor. You have the freedom to select from an array of fabrics, colors, and patterns, ensuring that your curtains seamlessly blend with your interior design while fulfilling their primary function of light blocking. Furthermore, the process of installing these curtains is relatively straightforward and can be accomplished with some basic tools and a bit of patience, saving you the expense of hiring a professional installer.
One of the primary benefits of blackout curtains is their ability to significantly reduce the amount of natural light entering a room. This makes them ideal for bedrooms, where they can help create a dark, restful environment conducive to better sleep. Additionally, they are perfect for media rooms or any space where you want to control the light for an optimal viewing experience. Beyond light control, blackout curtains also contribute to energy efficiency by providing an additional layer of insulation. This can help keep your home warmer in the winter and cooler in the summer, potentially reducing your energy bills.
When selecting blackout curtains, it's important to consider the quality and durability of the fabric. High-quality blackout curtains are typically made from thick, tightly woven materials that effectively block out light and offer sound dampening properties. These curtains can also add a layer of elegance to your home, with many designs featuring sophisticated textures and finishes. By investing in quality materials, you ensure that your curtains not only perform their function effectively but also enhance the overall look and feel of your interior spaces.
Another aspect to consider is the type of blackout curtain liner you choose. Liners can vary in their thermal insulation and sound dampening capabilities, so selecting the right one to meet your specific needs is crucial. A good blackout curtain liner will complement your chosen fabric and provide the necessary light-blocking properties without compromising on style.
In summary, DIY blackout curtains offer a unique combination of aesthetic appeal and practical benefits, making them a valuable addition to any home. By taking the time to carefully select your materials and install them properly, you can achieve a polished, professional finish that enhances your living spaces while providing essential light control and energy efficiency.
Essential Tools and Materials
Before embarking on your DIY blackout curtain project, having the right tools and materials on hand is essential to ensure a seamless and professional installation. Precision and quality are key elements that will make your efforts worthwhile.
First, a reliable tape measure is indispensable for getting accurate window dimensions. This helps in cutting your fabric to the right size and ensures that your curtains will cover the entire window area effectively. A level is also important for making sure that your curtain rod brackets are aligned properly. Misaligned brackets can result in uneven curtains, detracting from the overall look and functionality.
A good-quality drill is a must for securing the brackets to the wall. Depending on your wall type, you may also need appropriate anchors or screws. Curtain rod brackets are another critical component. These should be sturdy enough to support the weight of your blackout curtains. Consider choosing brackets that match the aesthetic of your room for a cohesive look.
Selecting the right blackout curtain liner is a vital step. Liners vary widely in terms of thermal insulation and sound dampening properties. A high-quality liner will not only block out light but also contribute to maintaining a comfortable indoor temperature and reducing external noise. This dual functionality makes them a valuable addition to your home.
When it comes to fabric, opt for durable, high-quality materials. Thick, tightly woven fabrics are the most effective at blocking light. However, they should also complement your home décor. Look for fabrics that offer a balance of functionality and style, ensuring that they enhance the overall aesthetic of your space.
Other useful tools include a pencil for marking measurements, a sturdy step ladder for reaching higher spots, and a pair of sharp fabric scissors. Having these tools at your disposal will make the process smoother and more efficient.
Additionally, consider purchasing curtain rings or grommets if they are not already included with your curtains. These accessories can make hanging your curtains easier and offer a polished finish. Depending on your curtain style, you might also need tiebacks or holdbacks to manage the drapes when they are open.
For those looking to add a personalized touch, decorative elements like trims, stencils, or fabric glue can be used to embellish plain blackout curtains. Simple sewing techniques can also be employed to create unique patterns or add additional layers of fabric for enhanced functionality and style.
With these tools and materials prepared, you’re well on your way to creating a beautifully finished, functional blackout curtain setup that will serve your home well for years to come.
Step-by-Step Guide to Installing Blackout Curtains
Accurate measurements are key to ensuring your blackout curtains fit perfectly. Begin by measuring the width and height of your windows, allowing for additional width to ensure complete coverage. Next, attach the curtain rod brackets to the wall, using a level to ensure they're straight. Once secured, hang your blackout curtains by threading the rod through the curtain grommets or rings. Adjust the curtains to ensure they fall evenly and cover the window entirely for optimal light blocking.
DIY Blackout Blinds Installation
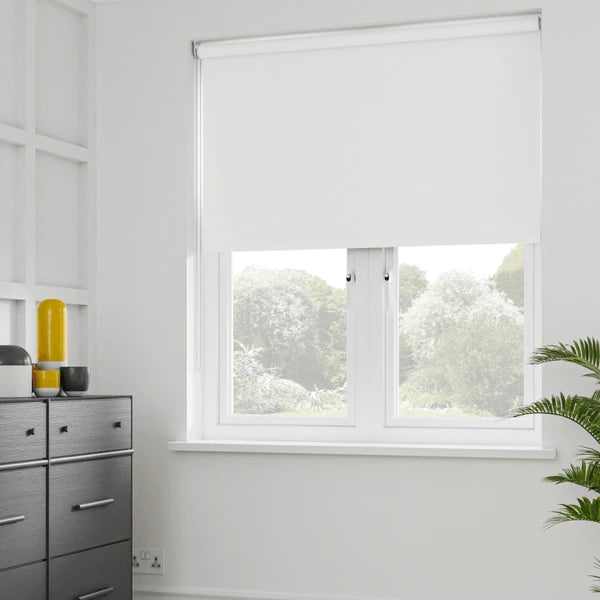
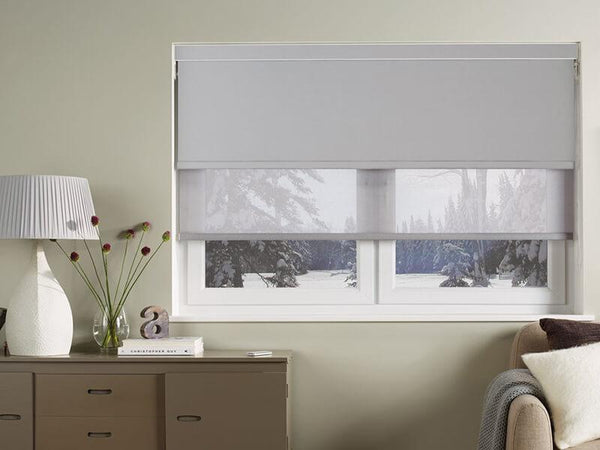
Blackout blinds provide an elegant and streamlined alternative to traditional curtains, offering both aesthetic appeal and practical benefits. Various styles, including roller, cellular, and Roman blinds, cater to different design preferences and functional needs. These blinds are particularly advantageous for their space-saving designs and enhanced insulation properties, making them a smart choice for modern homes.
Before starting your installation, gather all necessary tools and materials. You'll need a tape measure, level, drill, appropriate screws and anchors, mounting brackets, and, of course, your chosen blackout blinds. Precise measurements are crucial for ensuring a proper fit and optimal light-blocking performance.
Begin by measuring the interior width and height of your window frame. Accurate measurements will ensure that your blinds fit snugly within the frame, maximizing their effectiveness in blocking out light. Double-check your measurements to avoid any discrepancies that could affect the installation process.
Next, mark the positions for the mounting brackets inside the window frame. Use a pencil to make light marks where the screws will go, and ensure the brackets are level by using a spirit level. Properly aligned brackets are essential for the smooth operation and overall appearance of your blinds.
Drill pilot holes for the screws, which will make it easier to secure the brackets. If your window frame is made of a particularly hard material, such as metal or hardwood, be sure to use the appropriate drill bits. Insert wall anchors if necessary, depending on the material of your walls or window frame, to provide additional support for the brackets.
Once the brackets are securely installed, attach the blackout blinds. For roller blinds, this typically involves clipping the blind into the brackets. Cellular and Roman blinds may have different attachment mechanisms, so consult the manufacturer's instructions for specific guidance. Make sure the blinds are level and operate smoothly.
After attaching the blinds, test their functionality by raising and lowering them several times. Ensure that they move smoothly without catching or sticking. Properly functioning blackout blinds should glide effortlessly and provide complete coverage when fully extended.
If you encounter any issues, such as uneven blinds or difficulty in operation, revisit your measurements and bracket alignments. Minor adjustments can often resolve these problems and enhance the overall functionality of your blackout blinds.
In addition to their light-blocking capabilities, blackout blinds offer added insulation, which can contribute to maintaining a comfortable indoor temperature year-round. Their sleek design and range of available styles make them a versatile choice for various rooms, from bedrooms to living spaces.
To enhance the appearance of your blackout blinds, consider pairing them with decorative valances or side panels. These accessories can add a touch of elegance and seamlessly integrate the blinds into your overall interior design. Additionally, valances and side panels can help to conceal the hardware and provide a polished, cohesive look.
Overall, installing blackout blinds is a straightforward and rewarding project that can significantly improve your home's comfort and style. With careful planning and attention to detail, you can achieve a professional-quality installation that enhances both the functionality and aesthetic appeal of your living spaces.
Cost-Effective Blackout Curtain Ideas
Achieving a high-end look for your blackout curtains doesn't have to come with a hefty price tag. There are numerous ways to create beautiful and functional window treatments on a budget without compromising on style or effectiveness. One of the best strategies is to shop smartly for materials. Many fabric stores offer discounted remnants, which are perfect for smaller windows or for creating custom accents. Look out for sales and promotions on blackout curtain liners and fabrics. You might be surprised at the quality materials you can find at a fraction of the usual cost.
Another cost-effective approach is to repurpose existing curtains. If you already have a set of curtains you love, consider adding a blackout liner to the back. This can be easily sewn or attached with fabric glue or even curtain clips. Not only does this extend the life of your existing curtains, but it also enhances their functionality without the need to purchase a completely new set.
Personalization is another avenue to explore for budget-friendly blackout curtains. Adding decorative trims, stencils, or fabric paint can transform plain blackout curtains into custom masterpieces. A touch of creativity can go a long way in elevating the look of your curtains. Simple sewing techniques, such as adding a contrasting border or incorporating fabric panels, can give your curtains a unique and polished appearance. Even if you are not an experienced sewer, many of these techniques are easy to learn and execute with a bit of practice.
Consider using alternative materials as well. For instance, heavy-duty drop cloths or canvas can be an affordable substitute for traditional blackout curtain fabric. These materials are often available at hardware stores and can be treated with fabric dye to match your home decor. Paired with a blackout liner, they can be just as effective at blocking light and insulating your windows.
DIY no-sew methods can also be a cost-saver. Fabric glue, fusible bonding tape, and adhesive-backed Velcro are great tools for creating blackout curtains without a sewing machine. These methods are particularly useful for quick fixes or for those who prefer a less time-intensive project. With these tools, you can easily attach blackout liners or create hems and seams that look professionally done.
Don't forget about thrift stores and second-hand shops. These places can be treasure troves for finding inexpensive curtains and fabric. Sometimes, you can find high-quality, gently used curtains that only need a bit of modification to fit your windows perfectly. A little creativity and resourcefulness can go a long way in transforming these finds into stylish blackout curtains.
If you’re looking to save even more, consider sharing resources with friends or neighbors who might have leftover materials from their own projects. Swapping fabrics, trims, or even tools can be a fun and community-oriented way to reduce costs.
Incorporating these budget-friendly tips allows you to enjoy the benefits of blackout curtains without a significant financial investment. With a bit of ingenuity and effort, you can achieve a sophisticated and functional look that enhances the comfort and style of your home.
Troubleshooting Common Issues
During the process of installing blackout curtains and blinds, you may encounter a few challenges, but rest assured, most of these can be easily addressed with some thoughtful adjustments.
One common issue is uneven curtains or blinds. If you notice that your window treatments are not hanging straight, the first step is to revisit your measurements. Double-check the dimensions of your windows and ensure that your brackets or mounting hardware are level. Misalignment is a frequent culprit and can often be corrected by readjusting the brackets. Using a level can help you achieve the perfect alignment, resulting in a more polished appearance.
Gaps in coverage can also pose a problem, especially if you're aiming for complete light blockage. If you see light seeping through the edges, it may be due to incorrect measurements or improper placement of the curtain rod or blind brackets. Ensure that your curtain rod extends beyond the window frame on both sides and is positioned high enough to cover the top edge of the window. For blinds, make sure they fit snugly within the window frame. In some cases, adding an additional layer of blackout fabric or using wider curtains can help eliminate these gaps.
Operational issues, such as curtains catching or blinds not moving smoothly, can be another source of frustration. For curtains, check that the rod and rings or grommets are free of any obstructions. Sometimes, simply adjusting the position of the rings or ensuring that the rod is securely mounted can resolve these problems. For blinds, examine the mechanisms and ensure that the brackets are installed correctly. Lubricating the moving parts can also help in achieving smoother operation.
If your blackout curtains or blinds are not providing the desired level of darkness, consider the quality and type of fabric or liner you are using. High-quality, tightly woven materials are most effective at blocking light. Additionally, ensure that the liner is properly attached and that there are no gaps where light can seep through. Sometimes, replacing a liner or adding an additional layer can significantly improve the light-blocking capabilities.
Sound dampening is another feature many seek in blackout curtains. If you're not noticing a reduction in noise, it could be due to the fabric's thickness and density. Thicker, heavier fabrics generally offer better sound insulation. If needed, you can add a sound-dampening liner to enhance this feature. Ensuring that the curtains are properly installed and cover the entire window can also help in minimizing external noise.
Drafts and temperature control are other practical benefits of blackout curtains. If you find that your curtains are not helping to maintain a comfortable indoor temperature, check for gaps around the edges where air might be leaking in. Ensuring a snug fit and adding thermal liners can enhance the insulation properties of your curtains.
In some instances, the aesthetic appeal of your curtains or blinds may fall short of expectations. If your window treatments look wrinkled or creased, consider steaming or ironing them according to the fabric's care instructions. Properly hung curtains and blinds should have a smooth, even appearance that complements your interior décor.
By addressing these common issues, you can ensure that your blackout curtains and blinds not only function effectively but also contribute to the overall elegance and comfort of your home. Remember, a bit of attention to detail and some minor adjustments can make a significant difference in achieving a professional-quality finish.
Maintenance and Care for Blackout Curtains
Ensuring your blackout curtains remain in pristine condition requires a consistent yet straightforward maintenance routine. Start by vacuuming them regularly using a brush attachment to eliminate dust and debris. This simple step helps keep the fabric looking fresh and can prevent allergens from accumulating, contributing to a healthier living environment.
For a more thorough clean, it’s essential to follow the manufacturer’s care instructions closely. Some blackout curtains are machine washable, while others may require spot cleaning or professional dry cleaning. If machine washing is recommended, use a gentle cycle with cold water to prevent any potential damage to the fabric. It’s also advisable to use a mild detergent free of harsh chemicals, as these can deteriorate the blackout lining over time.
Spot cleaning is an effective way to address stains or spills without subjecting the entire curtain to washing. Use a soft cloth and a gentle cleaning solution to dab at the affected area. Avoid rubbing, as this can damage the fabric and spread the stain further. For stubborn stains, a professional cleaning service can offer specialized treatment to restore the curtain's appearance.
When it comes to drying, air drying is generally the best method. If you must use a dryer, select a low heat setting to prevent shrinkage and maintain the integrity of the blackout lining. Be sure to remove the curtains promptly to avoid creases. Ironing may be necessary for some fabrics; if so, use a low heat setting and iron on the reverse side to protect the blackout coating.
Periodically, it's beneficial to inspect your curtains for any signs of wear and tear. Check the hems, seams, and curtain rod attachments for any loose threads or fraying. Addressing these minor issues promptly can prevent more significant damage and extend the life of your curtains. If you notice any rips or significant wear, consider consulting a professional for repair or, if needed, replace the damaged components.
Maintaining the hardware is equally important. Ensure that curtain rods, rings, and brackets are securely fastened and free of rust or damage. Lubricating moving parts, such as curtain rings, can facilitate smoother operation and prevent wear.
To preserve the blackout qualities of your curtains, avoid prolonged exposure to direct sunlight when possible, as UV rays can degrade the fabric and lining over time. If your curtains are in a sunny spot, consider using a UV-protective spray to extend their lifespan.
With thoughtful care and attention to detail, your blackout curtains will continue to offer their dual benefits of enhanced aesthetics and practical functionality. Adopting these maintenance practices ensures that your window treatments remain a valuable addition to your home, providing comfort and style for years to come.