Mastering Roller Blinds Installation at Home
Mastering Roller Blinds Installation at Home
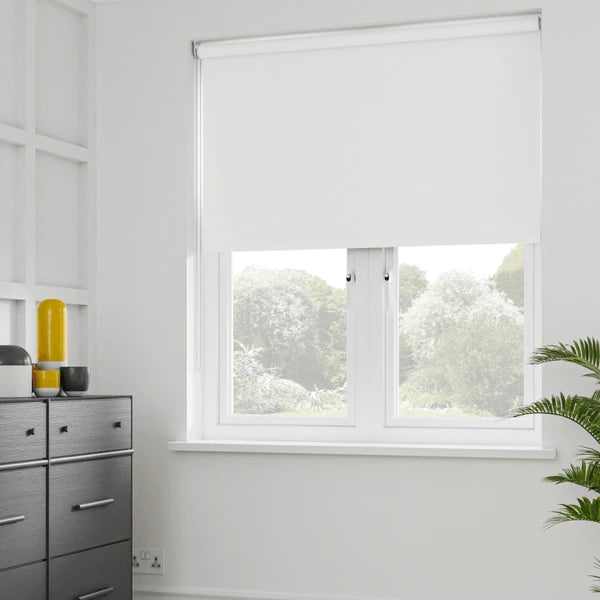
Introduction to Roller Blinds
Roller blinds offer a versatile and stylish solution for window treatments that can easily complement any room in your home. Their sleek design and functional benefits make them an excellent choice for those looking to enhance both the aesthetic and practical aspects of their living spaces.
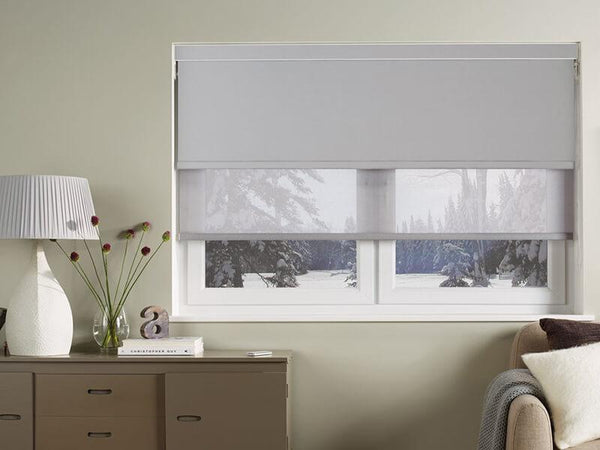
One of the key advantages of roller blinds is their ability to control light. Whether you want to let in natural sunlight during the day or block it out for privacy and better sleep at night, roller blinds provide the flexibility you need. They come in various materials, from light-filtering fabrics that diffuse sunlight to blackout options that ensure complete darkness, making them suitable for any room—from bedrooms to living rooms to kitchens.
In addition to light control, roller blinds also offer enhanced privacy. This is particularly important for street-facing windows or rooms that are overlooked by neighboring properties. By simply adjusting the blinds, you can prevent outsiders from peering in while still enjoying the benefits of natural light.
Energy efficiency is another notable benefit of roller blinds. During hot summer months, they can help reduce the amount of heat entering your home, keeping your interiors cooler and reducing the load on your air conditioning system. Conversely, in the winter, they provide an extra layer of insulation, helping to retain warmth and reduce heating costs.
The aesthetic appeal of roller blinds is another significant factor. Available in a wide range of colors, patterns, and textures, they can be customized to match any interior decor. Whether you prefer a minimalist look with neutral tones or a bold statement with vibrant colors and patterns, there's a roller blind to suit your taste.
Roller blinds are also known for their ease of use. With simple mechanisms, such as a chain or spring-loaded system, they are easy to operate and maintain. Many modern options even come with motorized controls, allowing you to adjust your blinds at the touch of a button or through a smartphone app, adding a touch of convenience and modernity to your home.
Finally, the durability and low maintenance of roller blinds make them a practical choice. They are generally easy to clean, requiring just a quick wipe with a damp cloth to keep them looking fresh. Their robust construction ensures they will last for years, providing a long-term solution for your window treatment needs.
Gathering Your Tools and Materials
Before starting your project, make sure to gather all the tools and materials you'll need for a smooth installation process. Proper preparation can save you time and prevent any mid-project delays. Here’s a checklist of what you'll require:
- Tape Measure: Essential for getting accurate dimensions of your window, ensuring the blinds fit perfectly.
- Pencil: Useful for marking drilling spots and measurement lines.
- Drill: A key tool for creating pilot holes and securing screws. Ensure you have the appropriate drill bits for your wall type.
- Screwdriver: Handy for tightening screws, especially in tight spaces where a drill may not fit.
- Level: Crucial for making sure your brackets are mounted straight, preventing the blinds from hanging unevenly.
- Screws and Wall Anchors: Typically provided with your blinds, but double-check to ensure they are suitable for your wall type.
- Roller Blinds: Of course, the centerpiece of your project. Ensure you have the correct size and type for your windows.
Organizing these tools and materials before you begin will streamline the process, making each step more efficient. This preparation is key to achieving a professional-looking installation.
Measuring Your Windows
Measuring your windows accurately is essential for a seamless installation of roller blinds. around 60% of DIYers encounter difficulties with measurements when installing blinds.
Here are the steps to ensure you get the correct dimensions:
1. Width Measurement: Begin by measuring the width of the window. If you plan to mount the blinds inside the window frame, measure at the top, middle, and bottom of the window opening. This helps you identify any slight variations in width, allowing you to use the smallest measurement for the most accurate fit. If you're mounting the blinds outside the window frame, measure the width of the area you want to cover, adding extra inches for better light control and privacy.
2. Height Measurement: Next, measure the height of the window. For an inside mount, measure from the top of the window opening to the bottom sill, taking measurements on the left, middle, and right sides. Use the longest measurement to ensure the blinds cover the entire window height. For an outside mount, measure from the top of the frame to where you want the blinds to end, typically extending a bit below the window sill for full coverage.
3. Double-Check Measurements: Always double-check your measurements before purchasing or cutting any materials. Small errors can lead to poor fitting blinds, which can be frustrating to correct once the installation is underway.
4. Considerations for Mount Type: Decide whether you want an inside or outside mount. Inside mounts provide a cleaner, more streamlined look but require precise measurements. Outside mounts can cover imperfections around the window frame and offer better light control but will require additional width and height measurements.
By taking the time to measure carefully and consider your mounting preferences, you can ensure that your roller blinds will fit perfectly and function smoothly.
Installing the Brackets
To begin installing the brackets, start by marking the spots where they will be mounted. Use a pencil to make small marks at the desired locations, ensuring they are level and evenly spaced from each other. This step is crucial for a balanced and stable installation.
Next, prepare to drill the pilot holes. This helps guide the screws and prevents the wall from cracking or the screws from slipping. Select a drill bit that matches the size of the screws provided with your blinds. Drill the pilot holes at the marked spots, making sure not to drill too deep.
With the pilot holes ready, position the brackets over them. Hold the bracket firmly in place and insert the screws through the bracket holes into the pilot holes. Use a screwdriver or drill to tighten the screws securely, but be cautious not to overtighten, as this could damage the wall or the brackets.
After securing the brackets, use a level to ensure they are perfectly aligned. Misaligned brackets can cause the blinds to hang unevenly and operate poorly. Adjust as needed before moving on to the next step.
For added stability, especially if mounting on drywall, use wall anchors. Insert the wall anchors into the pilot holes before screwing in the brackets. This provides a stronger hold and prevents the brackets from loosening over time.
Double-check the placement and tightness of the screws once all brackets are installed. Ensure everything is secure and level to avoid any issues when hanging the blinds.
Taking the time to properly install the brackets is essential for the smooth operation and longevity of your roller blinds. This foundational step sets the stage for a successful and hassle-free installation.
Hanging the Roller Blinds
Now that your brackets are securely in place, you can move on to hanging the roller blinds. This step is straightforward, but it requires a bit of precision to ensure the blinds function correctly.
First, identify the correct ends of the roller blind. One end will typically have a chain or cord mechanism, while the other end will have a pin or locking system. Make sure you have the blinds oriented correctly before proceeding.
Next, attach the roller mechanism to the brackets. Begin by inserting the end with the pin or locking system into its corresponding bracket. Once it is securely in place, move to the opposite end and insert the chain or cord mechanism into the other bracket. Ensure both ends are firmly seated in the brackets.
Once the roller blind is in place, test it by rolling it up and down a few times. This will help you ensure that the mechanism is functioning smoothly and that the blind is aligned properly. If you notice any issues with the rolling mechanism, now is the time to make any necessary adjustments.
If your roller blinds come with a safety clip or child safety device, make sure to install this according to the manufacturer's instructions. These devices are designed to keep the chain or cord securely out of reach of children and pets, reducing the risk of accidents.
After confirming that the blinds roll smoothly, you can make any final adjustments to the tension. Some roller blinds have a built-in tension adjustment feature, which allows you to control how tightly the blind rolls up. Consult your manufacturer's guidelines for specific instructions on how to adjust the tension.
Lastly, take a moment to ensure that the blinds hang evenly and do not tilt to one side. An uneven blind can be both visually unappealing and functionally problematic. If you notice any tilting, double-check that the brackets are level and that the roller mechanism is correctly seated.
By following these steps, you can ensure that your roller blinds are properly hung and ready for use. Enjoy the added comfort and style they bring to your home.
Final Adjustments and Tips
Once you have successfully hung your roller blinds, take a moment to review and fine-tune their position. Ensuring that everything is perfectly aligned and functioning well will help you enjoy the full benefits of your new window treatment.
First, double-check that the blinds are hanging evenly. Look at them from different angles to confirm that they are straight and not tilting to one side. If you notice any unevenness, you may need to adjust the brackets slightly. Sometimes, just loosening a screw and repositioning the bracket can make a big difference.
Next, test the rolling mechanism multiple times to ensure smooth operation. If you find that the blinds are sticking or not rolling up evenly, there might be an issue with the alignment of the roller mechanism. You can try adjusting the tension by following the manufacturer's instructions. Proper tension is crucial for the blinds to roll up and down smoothly.
If your blinds have a chain or cord mechanism, make sure it operates without any snags. A smooth pull should allow the blinds to move easily. If you encounter resistance, check for any twists or knots in the chain or cord and straighten them out. Additionally, ensure that the chain or cord is securely fastened to the wall using the provided safety clip or child safety device to prevent accidents.
For roller blinds that use a spring-loaded mechanism, ensure that the spring tension is correctly set. If the blinds are difficult to pull down or snap up too quickly, you may need to adjust the spring tension. Consult the manufacturer's guide on how to make these adjustments safely.
After verifying the functionality, focus on the visual aspects. Step back and ensure that the blinds are aesthetically pleasing and complement your room's decor. Adjust the height and positioning if necessary to achieve a balanced look. If you have multiple blinds in the same room, make sure they are all aligned at the same height for a uniform appearance.
Regular maintenance is key to keeping your roller blinds in top condition. Dust and dirt can accumulate over time, affecting both the look and functionality of the blinds. Use a soft cloth or a vacuum cleaner with a brush attachment to clean the blinds regularly. For stubborn stains, a damp cloth with mild detergent can be used, but be sure to test it on a small area first to avoid damage.
Additionally, inspect the blinds periodically for any signs of wear and tear. Look for frayed edges, loose brackets, or any damage to the rolling mechanism. Addressing these issues early can prevent more significant problems down the line.
Finally, consider adding accessories to enhance the functionality and appearance of your roller blinds. For instance, side channels or a valance can provide a finished look and improve light control. Motorized options can offer added convenience, allowing you to adjust the blinds remotely or set them on a timer.
Taking the time to make these final adjustments and perform regular maintenance will ensure that your roller blinds remain a stylish and functional addition to your home for years to come. Enjoy the improved aesthetics, privacy, and energy efficiency that your new window treatments provide.
Troubleshooting Common Issues
When installing roller blinds, you may encounter a few common issues that can affect their operation and appearance. Here's how to troubleshoot these problems effectively:
1. Blinds Not Rolling Smoothly: If your blinds are sticking or not rolling up and down smoothly, start by inspecting the roller mechanism. Check for any debris or dust that might be obstructing the path. Clean the mechanism with a soft cloth to remove any buildup. Also, verify that the roller is properly seated in the brackets and that there are no twists or kinks in the fabric.
2. Blinds Uneven or Crooked: An uneven or crooked blind can be both an eyesore and a functional issue. Double-check the alignment of the brackets using a level. If the brackets are not level, loosen the screws slightly, adjust their position, and retighten. Also, ensure that the fabric is evenly rolled on the tube. If the fabric is bunched up or uneven, roll it out completely and realign it before rolling it back up.
3. Blinds Falling Out of Brackets: If your blinds are not staying in place and keep falling out of the brackets, it could be due to improper installation or weak brackets. Ensure that the brackets are securely fastened to the wall or window frame and that the roller is correctly inserted into the bracket slots. If the brackets seem unstable, consider using stronger wall anchors or additional screws for extra support.
4. Chain or Cord Issues: If the chain or cord mechanism is difficult to operate, check for any knots, twists, or tangles. Straighten out any issues and ensure the chain or cord moves freely through the guide. If the chain feels too tight or too loose, adjust the tension according to the manufacturer's instructions.
5. Blinds Not Fully Covering the Window: If your blinds do not fully cover the window, remeasure the width and height to ensure they are the correct size. For inside mounts, the blinds should fit snugly within the window frame, while outside mounts should cover the entire window area with some overlap. If the measurements are incorrect, you may need to reposition the brackets or consider getting new blinds that fit better.
6. Blinds Not Staying Down: If your spring-loaded blinds do not stay down and keep rolling up on their own, the spring tension may need adjusting. Refer to the manufacturer's guidelines on how to increase or decrease the tension to achieve the desired operation.
7. Blinds Are Too Tight or Too Loose: Adjust the tension in the rolling mechanism if the blinds are either too tight to pull down or too loose and keep sagging. Most roller blinds have a built-in tension adjustment feature that allows you to set the optimal tension for smooth operation.
8. Fabric Fraying or Damaged: If you notice any fraying or damage to the fabric, inspect the edges for rough spots or sharp areas on the brackets or roller that might be causing wear and tear. Smooth out any rough edges and consider applying a fabric sealant to the frayed areas to prevent further damage.
By addressing these common issues promptly, you can ensure your roller blinds operate smoothly and look great, enhancing the overall comfort and appearance of your home. Regular maintenance and occasional adjustments will keep your window treatments in top condition for years to come.
Conclusion and Encouragement
Installing roller blinds yourself is an accomplishment that brings both functional and aesthetic benefits to your living space. As you’ve seen, careful planning and execution can make the process straightforward and manageable. Starting with accurate measurements ensures that your blinds fit perfectly, and taking the time to properly install the brackets and roller mechanism results in a smooth, hassle-free operation.
It's important to remember that attention to detail can make all the difference. Double-checking measurements, ensuring brackets are level, and making necessary adjustments to the rolling mechanism all contribute to a polished finish. These steps may seem minor, but they ensure your blinds not only look great but also function well over time.
For those moments when you encounter hiccups, like uneven hanging or a sticking roller, the troubleshooting tips provided can help you quickly resolve these issues without frustration. Addressing problems early on will keep your blinds looking and working their best.
The sense of satisfaction you'll gain from completing this project yourself is substantial. Not only will you have enhanced the look and comfort of your home, but you'll also have the confidence that comes from successfully tackling a DIY project. Plus, the skills you’ve learned are transferable to other home improvement tasks, empowering you to take on future projects with greater ease.
If you find yourself particularly pleased with the results, consider sharing your experience with friends or in online DIY communities. Your insights and tips could be invaluable to someone else embarking on a similar project. Whether it's a clever trick for getting brackets level or a recommendation for a specific brand of roller blinds, your experience adds value to the collective knowledge of the DIY community.
Additionally, think about how this project fits into your overall home improvement goals. Roller blinds can be just the beginning. Perhaps next, you might consider coordinating other window treatments or even tackling larger renovations. The confidence gained from this project can serve as a springboard for future endeavors.
In conclusion, taking the time to install your own roller blinds is a worthwhile effort that pays off in enhanced home aesthetics, better light control, and increased privacy. Each step, from measuring to final adjustments, contributes to a finished product that you can be proud of. So go ahead, enjoy your new roller blinds, and take pride in the fact that you accomplished this project on your own.