DIY Curtains: Tailor Your Home’s Look
DIY Curtains: Tailor Your Home’s Look
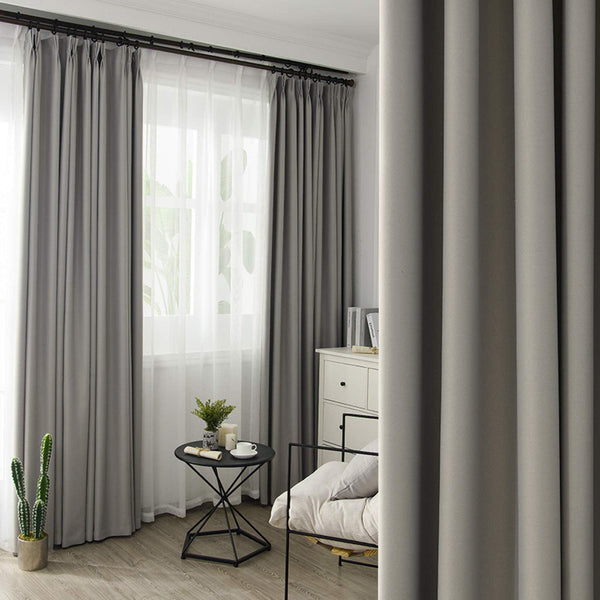
Introduction to DIY Curtains
Transforming your living space can be as simple as updating your window treatments. DIY curtains offer a cost-effective way to enhance your home’s ambiance while showcasing your personal style. Whether you want to add a splash of colour or a touch of elegance, creating your own curtains allows you to control every aspect of the design. This guide will take you through the steps of making your custom DIY curtain, ensuring a perfect fit and finish for your home.
DIY curtains offer the unique opportunity to tailor your window treatments to the exact specifications of your space. Store-bought curtains often fall short in either size or style, but with DIY, you have complete control over both. This means you can select the exact fabric, pattern, and colour that will best complement your existing decor.
One of the primary benefits of making your own curtains is the ability to customise them to your liking. You can experiment with different types of fabric, from heavy, insulating materials to lighter, breezier options. This flexibility allows you to create curtains that not only look good but also serve a functional purpose in your home, such as providing insulation or light filtration.
Another advantage is cost savings. Custom curtains from a designer can be expensive, but by doing it yourself, you can achieve a high-end look at a fraction of the price. Plus, the satisfaction of knowing you created something with your own hands adds an invaluable personal touch to your home.
Creating your own curtains also provides a sense of accomplishment and creativity. The process itself can be incredibly rewarding, offering a chance to learn new skills and techniques. From selecting the fabric to the final stitch, each step is a reflection of your taste and effort. Plus, you get to enjoy a tangible outcome that enhances your living space every day.
If you’re new to sewing or DIY projects, don’t worry. Curtain-making is a great entry-level project that doesn’t require advanced skills. Basic sewing techniques and a few simple tools are all you need to get started. And even if you make a mistake, it’s usually easy to fix or adjust.
Personalisation is another key feature of DIY curtains. You can add unique touches such as trims, tassels, or tiebacks that aren’t readily available in ready-made options. These details can elevate the overall look and feel of your curtains, making them truly one-of-a-kind.
In summary, DIY curtains are a fantastic way to improve your home’s interior without breaking the bank. You gain the flexibility to choose the perfect fabric, colour, and style while also enjoying the creative process. Whether you’re looking to make a bold statement or simply want to match your existing decor, making your own curtains allows you to achieve a custom look that’s perfectly suited to your home.
Choosing the Right Fabric
Selecting the appropriate fabric is essential to achieving the desired look and function of your curtains. Start by considering the room's purpose and overall style. For a bedroom or formal dining room, heavier fabrics like velvet or brocade can add a luxurious feel and provide excellent insulation. On the other hand, lightweight materials such as cotton or linen are ideal for creating a casual, airy atmosphere in living rooms or kitchens.
Next, think about the practical aspects of your fabric choice. If your curtains will be in a high-traffic area or a room where spills are likely, such as a kitchen or children's room, you may want to opt for fabrics that are easy to clean and durable. Fabrics like polyester blends or treated cotton can offer the durability and ease of maintenance needed in these settings.
When it comes to colour and pattern, your selection should complement your existing decor. Neutral tones can bring a sense of sophistication and timelessness to a room, while bold colours can make a strong visual statement. If your room already has a lot of colour, consider more subdued curtains to balance the space. Conversely, if the room is relatively neutral, vibrant curtains can act as a focal point.
Patterns also play a significant role in the overall design. Stripes, florals, and geometric patterns can add character and interest to your curtains. However, it's important to balance these patterns with the room's overall aesthetic to avoid overwhelming the space. For instance, if your furniture and walls are already patterned, you might opt for solid-coloured curtains to avoid clashing.
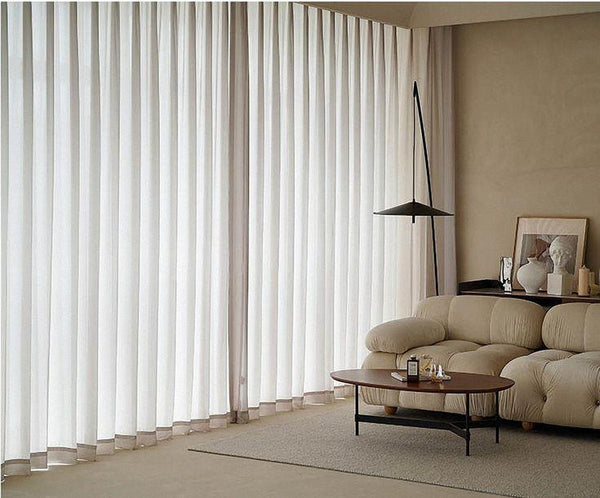
Another factor to consider is the fabric's weight and opacity. Heavy, opaque fabrics are excellent for rooms where you need more privacy and light control, such as bedrooms and media rooms. Lightweight, sheer fabrics can be perfect for spaces where you want to let in natural light while maintaining a sense of privacy, like living rooms and sunrooms.
Don’t forget about the texture of the fabric. Texture can add depth and interest to your curtains, even if the colour is subtle. Fabrics like silk or satin can add a touch of elegance, while materials like linen or burlap can create a more rustic or relaxed vibe.
Finally, consider the seasonality of your fabric choice. You might want heavier, insulating fabrics for the winter months and lighter, breathable options for the summer. This way, your curtains can contribute to the comfort and energy efficiency of your home throughout the year.
By thoughtfully selecting your fabric based on these considerations, you can ensure that your DIY curtains not only look fantastic but also serve their intended purpose effectively.
Measuring and Cutting Fabric
Accurate measurements are essential for ensuring your curtains fit perfectly. Start by measuring the width and height of your window, including any additional length if you prefer your curtains to puddle on the floor. Remember to account for seam allowances and any hardware you plan to use.
Once you have your measurements, lay your fabric out on a flat surface. Use a straight edge and fabric chalk to mark your cuts, ensuring precision. A rotary cutter or sharp fabric scissors will help you achieve clean edges. Take your time during this process to prevent errors that can affect the final appearance.
Sewing Your Curtains
Sewing your own curtains might seem daunting, but it's a straightforward process that anyone can master with a bit of practice. To get started, you’ll need a few essential tools: a sewing machine (or needle and thread for hand-sewing), fabric scissors, pins, measuring tape, and an iron.
Begin by hemming the edges of your fabric. Fold the edges over about half an inch and press them with an iron to create a crisp fold. Then, fold the edges over again, about another half inch, and press again. This double-fold will prevent fraying and give your curtains a clean, professional look. Pin the folds in place to keep them secure as you sew.
Next, sew along the folded edges using a straight stitch. If you’re using a sewing machine, adjust the stitch length to a medium setting to ensure durability. For hand-sewing, use small, even stitches to achieve a similar effect. Be sure to sew close to the inner fold, so the stitches are not too visible from the front.
Once the edges are hemmed, it’s time to create a rod pocket or attach curtain rings, depending on how you plan to hang your curtains. For a rod pocket, fold the top edge of the fabric over by several inches, enough to accommodate the diameter of your curtain rod, and press with an iron. Pin this fold in place, then sew along the bottom edge of the fold to create the pocket. Make sure the pocket is wide enough for the rod to slide through easily.
If you prefer to use curtain rings, sew small fabric loops or tabs along the top edge of the curtain. Space these loops evenly to ensure the curtain hangs uniformly. Alternatively, you can sew buttonholes and use clip-on rings, which can be easily attached and removed.
For added flair, consider sewing a decorative trim along the edges or bottom of your curtains. Choose a trim that complements your fabric and overall room decor. Attach the trim by pinning it in place and sewing it securely with a straight stitch. Ensure the stitches are even and follow the trim’s edge closely for a polished finish.
Press the curtains with an iron one final time to remove any wrinkles and to set the hems and folds. Proper pressing will enhance the appearance of your curtains and ensure they hang beautifully.
Remember, practice makes perfect. Don’t be discouraged if your first attempt isn’t flawless. Each project is an opportunity to improve your skills and gain confidence in your sewing abilities. Enjoy the process, and take pride in the personalised touch your handmade curtains bring to your home.
Adding Decorative Elements
Personalizing your DIY curtains with decorative elements can transform them from simple window coverings into a statement piece. Think of these embellishments as the final touch that reflects your unique taste and style.
Start with trims. Decorative trims can enhance the edges of your curtains and add a touch of elegance or a burst of fun. Options range from classic lace to modern pom-pom trims. To attach a trim, pin it along the edge of your curtain, ensuring it lays flat and even. Then, sew it in place using a straight stitch. Make sure your stitches are neat and follow the edge closely for a polished look.
Tassels can bring an element of luxury to your curtains. You can add tassels to the corners or the bottom edge for a dramatic effect. Sew them directly onto the fabric or attach them with small loops of thread. Tassels come in various colors and sizes, so choose ones that complement your fabric and room decor.
Consider incorporating fabric paint or stencils for a customised look. Fabric paint allows you to create designs directly on your curtains. Use stencils to add patterns or images, or freehand a design if you’re feeling artistic. Make sure to use fabric paint to ensure durability through washes.
Tiebacks are both functional and decorative. They hold your curtains open and add a stylish detail. You can create tiebacks from the same fabric as your curtains or choose a contrasting material. Simple fabric strips, braided cords, or even decorative ropes can serve as tiebacks. For an added touch, consider adding embellishments like beads or buttons.
For a chic and modern look, consider adding grommets to your curtains. Grommets are metal rings that reinforce holes and add a professional touch. They make it easy to slide your curtains open and closed while also adding an industrial or contemporary flair. Grommet kits are readily available, and installation is straightforward. Just measure and mark where you want the grommets, cut holes, and press the grommets into place.
Fabric layering is another way to add depth and interest. Layering a sheer curtain over a solid one can create a dynamic look while also offering flexibility in light control. You can sew the two fabrics together at the top or use separate rods for a more versatile arrangement.
Buttons can also be a charming addition. Sew buttons along the edges or randomly across the fabric for a playful touch. You can use buttons in contrasting colours for a pop of interest or match them to your fabric for a more subtle effect.
For a more rustic or bohemian look, consider adding macramé elements. You can attach macramé strips or fringes to the bottom edge of your curtains for a handcrafted touch. Macramé kits and tutorials are widely available, making it easy to create your own unique designs.
Ribbons offer another simple yet effective way to decorate your curtains. You can sew ribbons along the edges or create ribbon loops for hanging. Mixing and matching different ribbon styles can add a layered and textured look.
Don't forget about using fabric patches. If you have leftover fabric pieces from other projects, consider cutting them into shapes and sewing them onto your curtains. This patchwork effect can create a unique and eclectic look.
Adding these decorative elements allows you to customise your curtains in ways that store-bought options simply can’t match. Experiment with different combinations and enjoy the creative process as you make your curtains uniquely yours.
Installing Your Custom Curtains
Choosing the right hardware is crucial for the overall look and functionality of your custom curtains. Start by deciding on the type of rod or track that best suits your design. Classic rods work well for most styles and offer a wide range of finishes and finials, from elegant brass to sleek, modern metals. Tracks, on the other hand, provide a contemporary and minimalist look, and are particularly useful for heavier curtains or large windows.
Before installing, make sure you have the necessary tools on hand: a tape measure, a level, a pencil for marking, a drill, screws, and wall anchors. Begin by measuring the width of your window to determine the length of your curtain rod or track. A general rule of thumb is to extend the rod about 4-6 inches beyond the window frame on each side to ensure the curtains fully cover the window when closed.
Next, decide on the height at which you’ll mount your hardware. For a more dramatic and elongated appearance, place the rod several inches above the top of the window frame. This not only adds visual height to your room but also ensures that the curtains will fall gracefully. Mark the spots where you will install the brackets or track mounts using a pencil.
If your walls are drywall, use wall anchors to ensure that the hardware is securely fastened. For heavier curtains or large windows, consider using additional brackets for extra support. Drill pilot holes where you’ve marked your spots, insert the wall anchors, and then attach the brackets or mounts with screws.
Once the hardware is securely in place, it’s time to hang your curtains. If you’re using a rod with rings, simply slide the rings onto the rod and then hang the rod on the brackets. For a rod pocket curtain, thread the rod through the pocket at the top of the curtain and then place the rod on the brackets. If you opted for a track system, attach the curtains to the carriers on the track according to the manufacturer’s instructions.
Ensure that the curtains can move smoothly along the rod or track. If you encounter any resistance, check to see if the rod or track is level and adjust as needed. For a finishing touch, add finials to the ends of the curtain rod. These decorative elements can range from simple end caps to intricate designs, adding a personalised touch to your window treatment.
Consider the way your curtains fall to ensure they look their best. For a polished appearance, arrange the pleats evenly and use tiebacks or holdbacks to gather the curtains when open. This not only frames your window beautifully but also allows maximum light to enter the room.
If you’ve added any decorative elements like tassels, trims, or tiebacks, ensure they are securely attached and positioned for maximum impact. These small details can enhance the overall aesthetic and make your custom curtains truly stand out.
Regularly check the hardware to ensure it remains securely fastened, especially if you open and close your curtains frequently. Tighten any loose screws and adjust the brackets if necessary to maintain the curtains' position and functionality.
Maintenance and Care
Proper care is key to keeping your DIY curtains looking fresh and vibrant for years to come. The first step is to understand the specific care requirements of your chosen fabric. Some materials can be machine washed, while others may require dry cleaning or hand washing to maintain their quality.
For machine-washable fabrics, use a gentle cycle with cold water to prevent shrinking and fading. It’s a good idea to remove any decorative elements like trims or tassels before washing, as these can be delicate. After washing, hang your curtains to air dry rather than using a dryer, which can cause wrinkles and shrinkage. If ironing is necessary, use a low heat setting and press on the reverse side to avoid damaging the fabric.
For fabrics that require dry cleaning, take your curtains to a professional cleaner who has experience with home textiles. Be sure to inform them of any specific instructions or concerns, such as the presence of delicate trims or special finishes.
Regular vacuuming can also help maintain the appearance of your curtains. Use the upholstery attachment on your vacuum cleaner to gently remove dust and dirt. This is particularly important for heavier fabrics like velvet or brocade, which can accumulate dust over time. Vacuuming your curtains not only keeps them clean but also helps to prevent allergens from building up in your home.
Rotate your curtains periodically to ensure even exposure to sunlight. This can help prevent uneven fading, which is especially important for rooms that receive a lot of natural light. If possible, consider using a lining fabric to protect the curtain material from direct sunlight. Linings can also provide additional insulation and light control, enhancing the functionality of your curtains.
Addressing stains promptly can prevent them from setting and becoming permanent. Blot any spills with a clean, dry cloth to absorb as much liquid as possible. Avoid rubbing, as this can push the stain deeper into the fabric. For stubborn stains, spot clean with a mild detergent and water, testing the solution on a small, inconspicuous area first to ensure it doesn’t cause discolouration.
Inspect your curtains regularly for signs of wear and tear, such as loose threads or frayed edges. Small repairs can be easily managed at home with a needle and thread, while more significant damage might require professional attention. Keeping your curtains in good repair ensures they remain a beautiful and functional part of your home decor.
Consider using curtain tiebacks or holdbacks to keep your curtains open during the day. This not only allows more light into the room but also helps to prevent creasing and wear along the folds. When closing your curtains, handle them gently to avoid pulling or stretching the fabric.
Seasonal care can also make a difference. In the warmer months, lighter fabrics may need more frequent washing due to increased dust and pollen. In winter, heavier fabrics might benefit from a thorough vacuuming to remove any accumulated dust.
By following these care tips, you can extend the life of your DIY curtains, keeping them looking as beautiful as the day you made them. Regular maintenance not only preserves the aesthetic appeal of your window treatments but also ensures they continue to function effectively, enhancing the comfort and style of your home.